Good Morning I hope every ones weeks has been great thus far. I have been busy putting this book- box/card together. I saw it somewhere out in blog land a while ago and it's been on my to-do list forever. I really wish I knew where I saw it so I could give that person credit for their creativity. I used one of McMahon Five Designs newest digi called "Mommies Hat". Isn't she adorable? I just love her big fluffy feather.


Supplies Needed
Heavy paper (I use Canson water color paper)
Ruler
Scissors/paper cutter
Scoring tool
Ink
Glue/Double sided tape
Decorative Punch
Designer paper
Lace/ribbon
Embellishments
*********************************
cut 2 pieces of your water color paper measuring 10cmX 24cm
cut 2 more pieces of water color paper measuring 12cmX 24cm
(sorry the penny is just a focal point for my camera)

Score all the way down the long side at
2cm, 4cm, 6cm, 8cm, 10cm, 12cm, 14cm, 16cm, 18cm, 20cm, 22cm
Follow these directions on all 4 pieces

When you score and fold they should look like an accordion

If you prefer to ink them do so now before gluing

Take one of the 10cm pieces and one of the 12cm and stack the folds

Glue just the end flaps

This show the flaps on both sides

Make sure you hold it firmly until the glue is dry

Follow the same directions with all 4 pieces

When it's all glued together it should look like this.
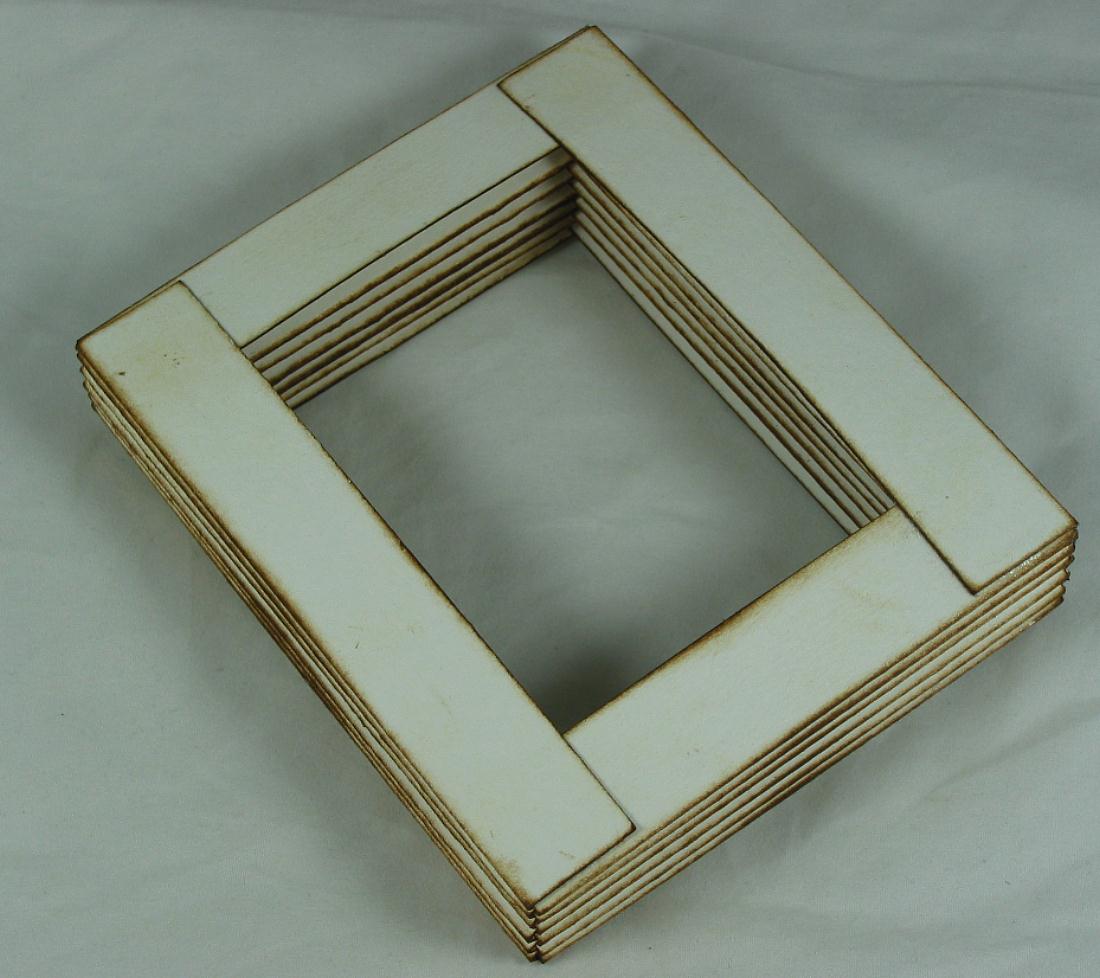
Just a side profile showing the inside and out.

Cut 2 pieces of the water color paper measuring 12 1/2cmX 3cm

Cut another 2 pieces of water color paper measuring 10.16cm or (4 inches) X 3cm
(Sorry I forgot to write X 3cm on my picture)

Take your decorative punch and punch all 4 pieces and ink them up

When you glue them onto the box they should look like this

Just a side profile

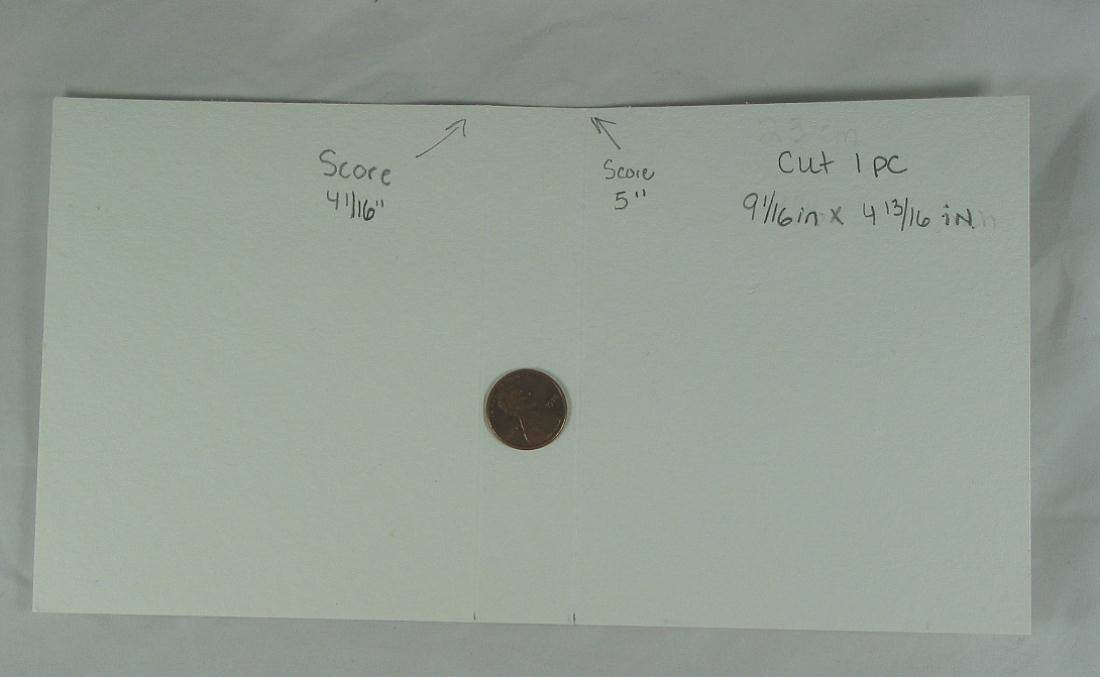
Cut a piece of you water color paper measuring 9 1/16 in X 4 13/16 inch
Score at 4 1/16 inch and 5 inches
This will be the book cover
(Oopsies I just realized I switched from cm to inches)
Cut out panels for all sides of the book cover

Before gluing you cover on glue one strip of your lace or ribbon
Follow these direction for the inside bottom glue the ribbon and cover it with your decorative paper

Glue down your panels and book to the right side of the book cover
embellish as desired


I really really hope you give this a try and if so I would love to see your creation.
Good luck and have fun!
Hugs Bonnie


24 comments:
OMG Sis Im so scraplifting this I love it! You have had your crafty little hands busy I can't wait to see whats next.
~Patricia
Wow this looks amazing, on my todo list.
What a beautiful project- I am so visual- love the picture tutorial- this is going on my to do list- Thanks for the fabulous inspiration Bonnie!
I have seen a similar tut before, but you make it look much easier. Thanks for the wonderful tut. Now i finally can try this one.
Hugs...mona
This is fab Bonnie! Thanks for the great tutrial too! Hugs Rebekah xx
ADORE this so much I am going to have to make one of these oh goodness it is just perfect.
Hugs,
Raven
Great tutorial Bonnie! I want to give this a try, thanks for the inspiration. :) Love the cute image, just beautiful work as always.
Love,
Chelsea
Okay?!!!!!! OMG, this is freakin' gorgeous! Your tutorials are always so awesome!!!! hmmmm .. shall I give this one a try? lol .. yea right .. knowing ME .. my book would definitely fall apart. lol .. I guess I should just leave the wonderfully creative things to you. hehe! :) You have coloured this image FABULOUSLY!!! Woman, you totally ROCK!
Love,
Elise
Fabulous! Love the paper!
Muchas gracias por este increible tutorial, tenia ganas de ver como se hacia y lo has hecho muy facil. Quizas me decida.
Precioso blog, todos los trabajos son super creativos, enhorauena.
Besitos.
wow just stunning!!!
Awesome creation Bonnie this looks absolutely wonderful the colours and image also the book card itself, wowwww.
Hugs
Lorraine x
Wow Wow Wow this is amazing. Thank you for the tutorial. Hugs, Wendy x
Wow! Great tutorial. Your coloring of the image is fabulous! So much better than mine! Love your magnolia card above too. Wow! What a ton of intricate detail. So beautiful!
Thank you very much for the tutorial! I made a box :)
http://iruuuha.blogspot.com/2011/05/blog-post_15.html
Good idea! Really liked the box.
I love this!! thanks so much for the tutorial! ♥
Yesterday I discovered a tutuorial by Cammi on Cuttin' Up blog maybe this is where you saw it. I did find lots of other sites though when I googled 'Book box'
Yours is very pretty.
Wow what a stunning card. Can't wait to try this!! TFS
Really inspired to try a box card now. Thanks for sharing. Linda H
What a lovely idea! Can't wait to try it. Thanks so much for sharing x
This is brilliant. Thanks so much for the very clear tutorial. I am going to have a go at this one!
Lindo! Obrigada pelo tutorial muito bem explicado.
Beijocas no coração.
I made a few of this "book boxes" and I love it. It needs a lot of work but the final look is amazing :). Thanks for sharing tutorial!
pa pa
Ne-ja
Post a Comment