Wednesday, April 20, 2011

Hanglar Time to Celebrate

Well Good Morning! You will find that this is my second post of the day. Scrolling down you will find the announcement of CLP's Newest Designers and a upcoming Blog Hop in celebration. So be sure to mark your calanders.
Today's card features an adorable Hanglar stamp. I just can't get enough of these little cuties. I am practicing working with my reds and also a new technique of dotting around the image. Hmmm not too sure about that. I think I need a little more practice.
I am submitting my card into the following challenges
Incy Wincy #90 Bright and Bold (WINNER)

Tuesday, April 19, 2011

Announcing CLP'S newest Designers!!! Yeah!!!

Many thanks to all the wonderful, talented and sweet applicants we had for the DT call.
It was not easy to pick only a handful of designers from a World full of talents...we sincerely Thank You for wanting to be part of our team.
We are so happy to finally announce the new Designers...Let's get start!
Our Design Team consists of Bonnie, Chelsea, Elise, Hege, Lori and Stephanne who have been there from the start of the Challenge Blog.
Now we would like to welcome our new Team Members...Dunja, Eulanda, Maria, Randi, Tanja and Yvonne!
A big warm welcome to our group ladies!!!

Our CLP family consist of 12 Designers who will inspire you to join our Monthly Sketch Challenge.
Click on their name to visit their Blog...

It's time to celebrate!!!
In addition to welcoming our new members, we are also having a Birthday Blog Hop!
CLP Challenge blog is now in it's second year!!!
Thanks to all our wonderful Sponsors, our amazing Designers, and of course...YOU...our wonderful players.
Don't forget to mark your calendar (May 1 - 6) and hop along with us.

Don't forget to take part in our current Challenge.
We look forward to another wonderful year with you all.
Thank you for all the wonderful support.

Monday, April 18, 2011

Belles 'n Whistles Thinking of You

*****UPDATE*****

Good Morning everyone! I hope you had a lovely weekend! I am back in my studio after a weekend of getting better acquainted with my Copic Markers. For those of you that don't already know I had taken  Copic classes with Suzanne Dean this past Saturday and Sunday. Both classes were 5 hours long but still I wanted more. I was sad when it came to an end. I'm thinking of becoming a Suzanne Dean groupie. I would be more than happy to carry her Copic markers across the country. No really I'm serious! hee hee

Today's card features one of Belles 'n Whistles newest stamps from the Fairy Friends collection. This stamp which is called "Fairy Fond Thoughts", I was fortunate to have won it on Belles 'n Whistles most recent blog hop. Yeah for me!!

One of the many fabulous techniques I learned in Suzanne's class was the feathering effect. Which I used on her wings. It's taking two colors and bringing them together. Wicked cool right? Try it you'll absolutely love the effect. Thanks Suzanne!
I hope my card has inspired you even a little.
Thank you for stopping in. I always look forward to hearing from you. Hugs Bonnie
I'll be submitting my card into the following challenges
Addicted to Stamps #2 sketch(WINNER
Incy Wincy #90 bright and bold(WINNER)

Sunday, April 17, 2011

Easter cards

Hello my lovelies! I hope all is well and that this past week was full of creativity for you.
Today I have some fun Easter cards to share with you. Did a bit of cheating on these little darlings which I purchased off Ebay and Dr'ed them up with Copics and Stickles. I just couldn't help myself when I saw my good friend Becky's card created with them I had to do it myself.
I used Spellbinders for the frame and added some lace to the outside. The other die cut pieces
are from Die-namics. Designer paper by My Minds Eye called Bloom and Grow. The pearls along the right side are from Recollections these are really beautiful. The bauble with the little bunny's inside was a gift from my dear friend Stella. I added a handmade stick pin. I'm really into those right now, they just add so much. On the second picture is a close up of a handmade flower charm.
These will probably be my last two Easter projects at this time. So I hope they give you that last minute spark of Easter inspiration. 
 
I used Spellbinders for the sentiment and Die-namics for the border. I added some pretty ribbon/lace along the top and placed some pearls inbetween the flowers. Paper is by My Minds Eye called Bloom and Grow. I added a cute little egg charm.

Friday, April 15, 2011

Magnolia Butterfly Kisses Butterfly Dreams

Good Morning! Happy Friday! I am so excited I only have one more day until my Copic classes with Suzanne Dean!!!! So then I will have to keep myself really busy so I don't go nuts thinking about it.
Today's card features yet another Magnolia stamp from the newest collection Butterfly Dreams.
I colored her in using my Copis and added Twinkling H2O's heavenly to her wings. This stuff is really cool. I also added some Liquid Pearls.
Thanks for stopping in today for a visit! I always look forward to hearing from you.
Have a Sparkling Day! Hugs Bonnie

Thursday, April 14, 2011

McMahon Five Designs New image and Tutorial

I am very excited to show you today's Easel card that I created using one of McMahon Five Design newest image. I also included a step by step tutorial on how I put it all together.
********************************
Supplies needed:
Card Stock
Designer Paper
Ruler
Scoring Tool
Glue or double sided tape
and your embellishments
******************************
Cut one piece of card stock measuring 6"X 12" and score at 6" and at 9" on the long side. This will be your base.

Take a second piece of card stock and cut measuring 6"X 6". This will be your card topper.

Fold base card stock along the scored lines and it should look like this.

Cut some designer papers to create your card topper. I inked my edges with Vintage Photo Distress ink.

I colored in my lovely image using my beloved Copics and created a frame for her, also inked the edges with Vintage Photo Distress ink.

Here is my completed card topper

I applied double sided tape on the base only where shown. The bottom half of the card topper will attach here.

And should look like this.

Inside bottom of card. Please note that when I embellished the base I added a 3-D embellishment so that when the card is in the open position it will rest against the embellishment and not slide closed. Oh I hope that made sense.

Front view of completed card

Side view of completed card.
I hope you have enjoyed today's tutorial and that you will give it a try. Please let me know if you do, I'd love to see your creation.

Wednesday, April 13, 2011

Happy Easter Chick!!

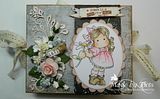
Hello and good morning! Today's card I created using a stamp that I purchased on my bus trip shopping spree last week. It's by Stampavie called Easter Chick, wicked cute right? I colored this little darling in using my Copic markers. Designer papers by DCWV. I used Spellbinder die cuts for the sentiment and chick frame and I added Liquid Pearls around both.
Thanks for stopping in on this lovely but rainy day! I soooo love hearing from you.
Hugs Bonnie
I am submitting my card into the following challenges
7 Kids Collage Fund #19 Easter/Spring
Copic Creations #47 favorite coloring technique Copic w/Prisma
Creative Belli #115 Eggs/ bunny's
Crafts and Me #30 ribbon
Paper Issues show us your grass
Simon Says Stamp card for a child


Related Posts Plugin for WordPress, Blogger...