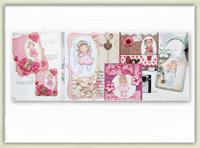
I am very excited to show you today's Easel card that I created using one of McMahon Five Design newest image. I also included a step by step tutorial on how I put it all together.

********************************
Supplies needed:
Card Stock
Designer Paper
Ruler
Scoring Tool
Glue or double sided tape
and your embellishments
******************************
Cut one piece of card stock measuring 6"X 12" and score at 6" and at 9" on the long side. This will be your base.

Take a second piece of card stock and cut measuring 6"X 6". This will be your card topper.

Fold base card stock along the scored lines and it should look like this.

Cut some designer papers to create your card topper. I inked my edges with Vintage Photo Distress ink.

I colored in my lovely image using my beloved Copics and created a frame for her, also inked the edges with Vintage Photo Distress ink.

Here is my completed card topper

I applied double sided tape on the base only where shown. The bottom half of the card topper will attach here.

And should look like this.

Inside bottom of card. Please note that when I embellished the base I added a 3-D embellishment so that when the card is in the open position it will rest against the embellishment and not slide closed. Oh I hope that made sense.

Front view of completed card

Side view of completed card.

I hope you have enjoyed today's tutorial and that you will give it a try. Please let me know if you do, I'd love to see your creation.


.png)
.jpg)


9 comments:
Hi Bonnie, wow this is so fabulous, just perfect. right up my street, love the base just as much as the topper. gorgeous. hugs chris xx
Georgeus card, lovely colors and embellishments. :)
XX Anne
Gorgeous easel card Bonnie!! Love all your 3D embellishments and papers and everything. Lovely job =)
Fab tutorial Bonnie! The colours on this are lush and I love that sweet image! Hugs Rebekah xx
Busy Busy Busy is what you are! You are whipping out these gor-gies like crazy! Wow! Oh gosh how I love all the different shapes and textures on your creation! And your colouring is totally FABULOUS!! This is beautiful as always SugarBons!
Love,
Elise
What a beautiful card and an awesome tutorial. I love all the embellies surrounding the sentiment and the colors of the card.
Another awesome tutorial. You soooo rock! I love your card, and the coloring is just perfect. What a pretty way to display your sentiment too.
Hugs,
Carolyn
So fun! Love all the brown colors on this!
Beautiful- I love the colors- and all of the embellishments! The step by step easel card tutorial is great. The flowers are so nice too- the bow is just right too.
Post a Comment